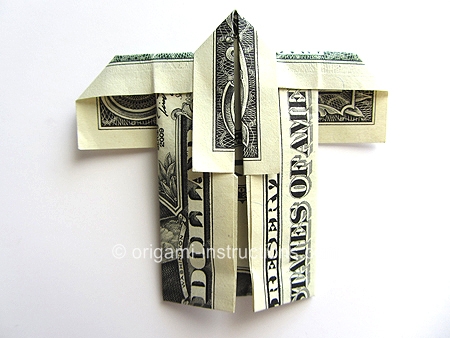
Dollar Bill or Money Origami Kimono
Kimonos are known to be quite expensive but this one will only cost you a dollar! Here are instructions for folding the money origami kimono.
Made this origami? Comment and Submit your photo using the comment box at the end of this page!
Money Origami Kimono Step 1: Start with a dollar bill, George Washington side down.
You can also fold this with a regular origami paper that's been divided into the US dollar proportions. We've created a separate page of instructions on how to do that.
Fold dollar bill in half. Crease well and unfold.
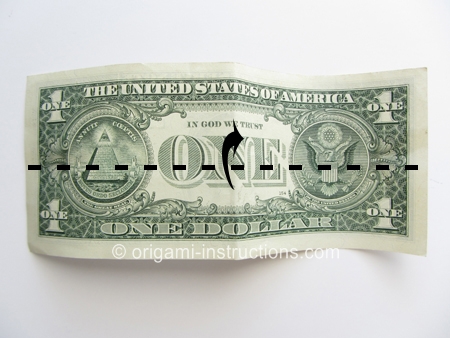
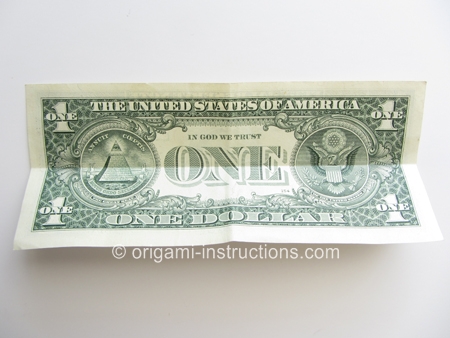
Money Origami Kimono Step 2: Fold the right edge inwards (~ 8mm).
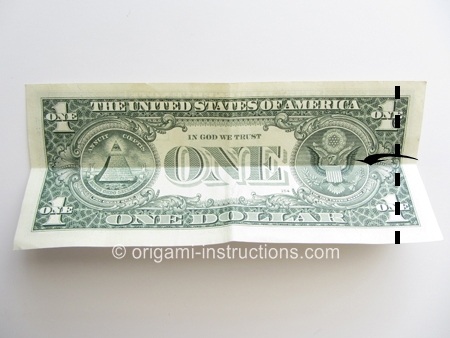
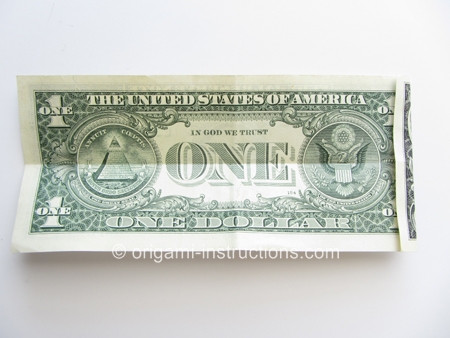
Money Origami Kimono Step 3: Flip dollar bill over.
Fold the top and bottom right tips to the center. Crease well.
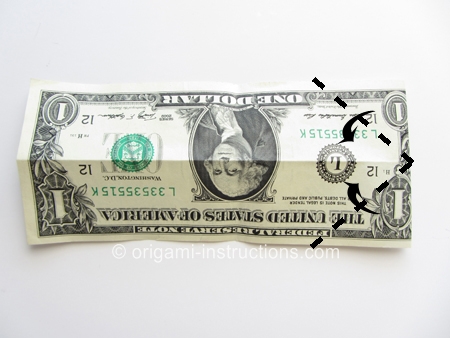
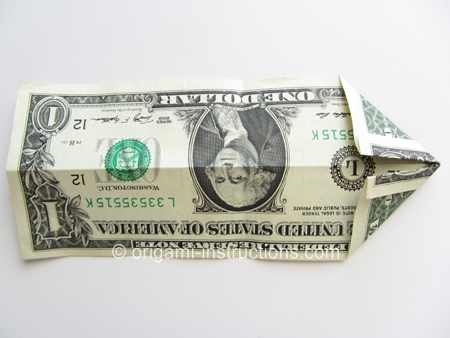
Money Origami Kimono Step 4: Make a vertical mountain fold as shown, bringing the left edge over to the right.
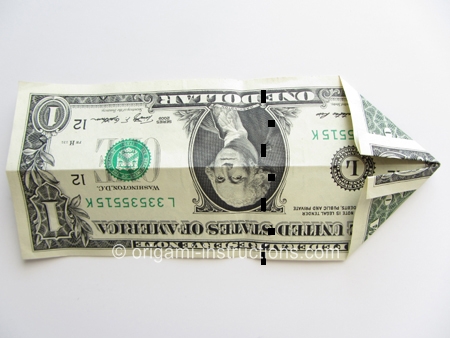
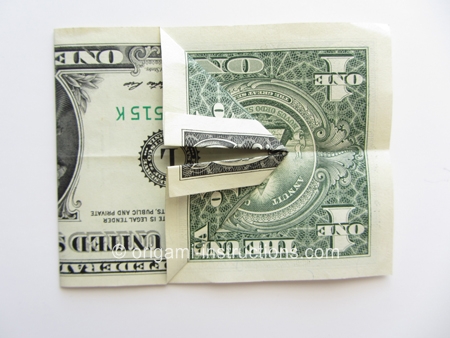
Money Origami Kimono Step 5: Make another mountain fold as shown.
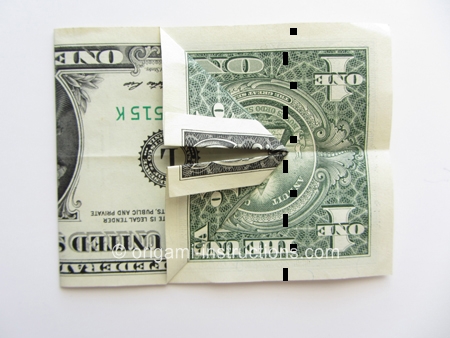
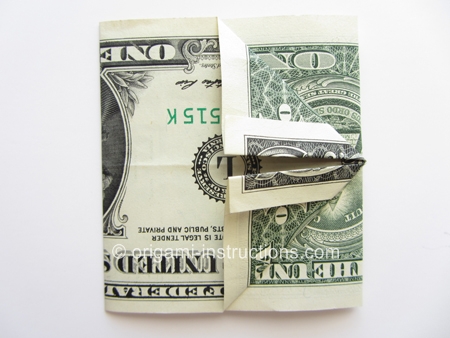
Money Origami Kimono Step 6: Rotate the dollar bill.
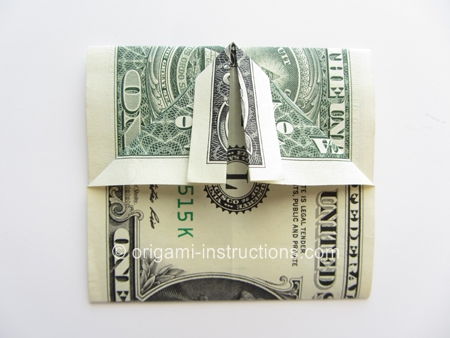
Money Origami Kimono Step 7: Fold both sides to the center.
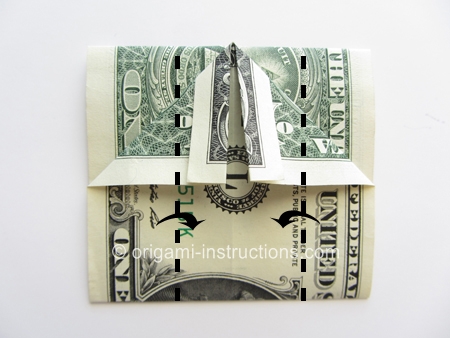
As we do so, we're also going to make a squash fold at the top. To make the squash fold, pry paper open and press it flat to form a triangle.
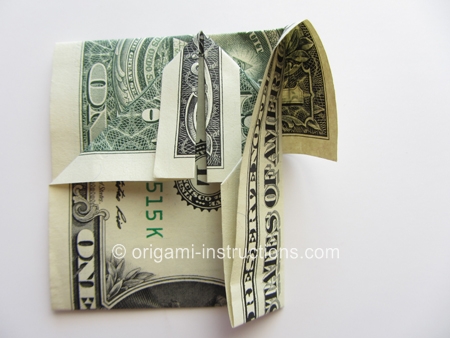

Repeat for the left side.


Money Origami Kimono Step 8: Flip dollar bill over.
Fold down the top edge. Crease well.
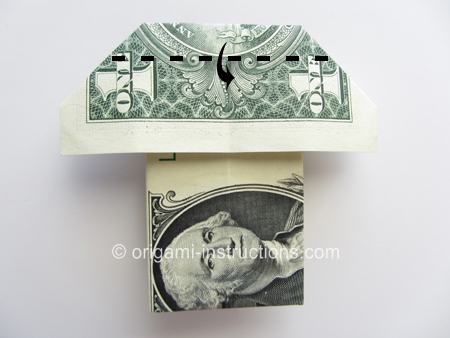
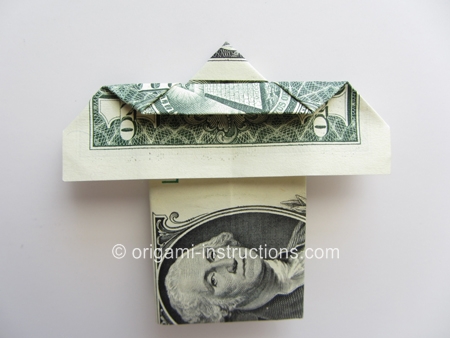
Money Origami Kimono Step 9: Flip dollar bill over again.
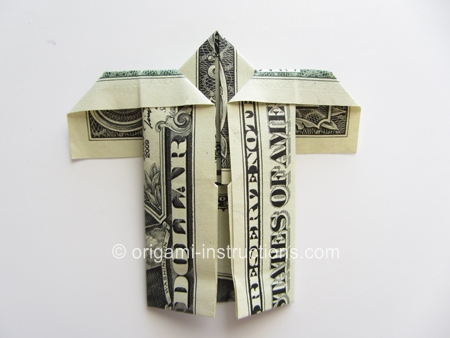
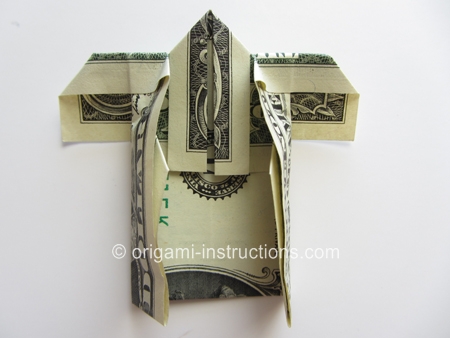
Money Origami Kimono Step 10: The final step is to tuck the upper layer under the kimono "collar".
To do so, first open the top layer slightly. Then slide the upper layer under the kimono collar as shown in the photos below.

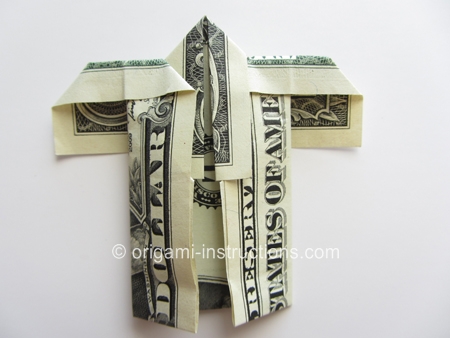
Tuck the upper left layer under the collar as well.
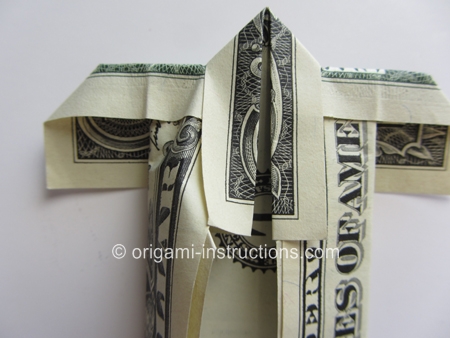
and your money origami kimono is complete!
